15-min. Easy Japanese Tuna Onigiri is a delightful and quick dish that fits perfectly into any meal routine. These rice balls are not only simple to make but also packed with flavor, thanks to the combination of creamy tuna and tangy mayo, all wrapped in crispy nori. Enjoy them for breakfast, as a snack, or even as a delightful addition to your lunchbox or picnic. With just six ingredients and 15 minutes of preparation time, you can whip up this Japanese classic in no time!

Jump to:
- Why You’ll Love This Recipe
- Tools and Preparation
- Essential Tools and Equipment
- Importance of Each Tool
- Ingredients
- For the Onigiri
- For the Filling
- How to Make 15-min. Easy Japanese Tuna Onigiri
- Step 1: Prepare the Rice
- Step 2: Prepare the Tuna Filling
- Step 3: Prepare Nori Sheets
- Step 4: Shape the Rice Balls
- Step 5: Form Into Triangles
- Step 6: Wrap with Nori
- How to Serve 15-min. Easy Japanese Tuna Onigiri
- As a Breakfast Treat
- For Lunch Boxes
- At Picnics
- As an Appetizer
- How to Perfect 15-min. Easy Japanese Tuna Onigiri
- Best Side Dishes for 15-min. Easy Japanese Tuna Onigiri
- Common Mistakes to Avoid
- Storage & Reheating Instructions
- Refrigerator Storage
- Freezing 15-min. Easy Japanese Tuna Onigiri
- Reheating 15-min. Easy Japanese Tuna Onigiri
- Frequently Asked Questions
- How do I prepare the rice for onigiri?
- Can I use other fillings for my onigiri?
- What is the best way to eat tuna onigiri?
- Can I make these ahead of time?
- Is there a vegetarian option for this recipe?
- Final Thoughts
- 📖 Recipe Card
Why You’ll Love This Recipe
- Quick Preparation: With just 15 minutes needed, this recipe is perfect for busy days.
- Versatile Serving Options: Ideal for breakfast, snacks, or lunchboxes, making it a go-to meal.
- Delicious Flavor Combination: The mix of tuna and Japanese mayo creates a creamy filling that’s irresistible.
- Healthy Ingredients: Packed with protein and made from wholesome components, it’s a nutritious choice.
- Customizable: Adjust the amount of nori or add your favorite seasonings to suit your taste.
Tools and Preparation
Before diving into the recipe, gather your tools to ensure a smooth cooking process. Having everything ready will help you stay organized.
Essential Tools and Equipment
- Rice paddle
- Mixing bowl
- Fine sieve
- Plastic wrap (optional)
- Bowl of water
Importance of Each Tool
- Rice paddle: This tool helps easily mix and season the rice without mashing it.
- Fine sieve: Essential for draining excess liquid from the tuna, ensuring the filling isn’t watery.
- Plastic wrap: Useful for shaping onigiri if you don’t have an onigiri mold; it keeps things neat.
Ingredients
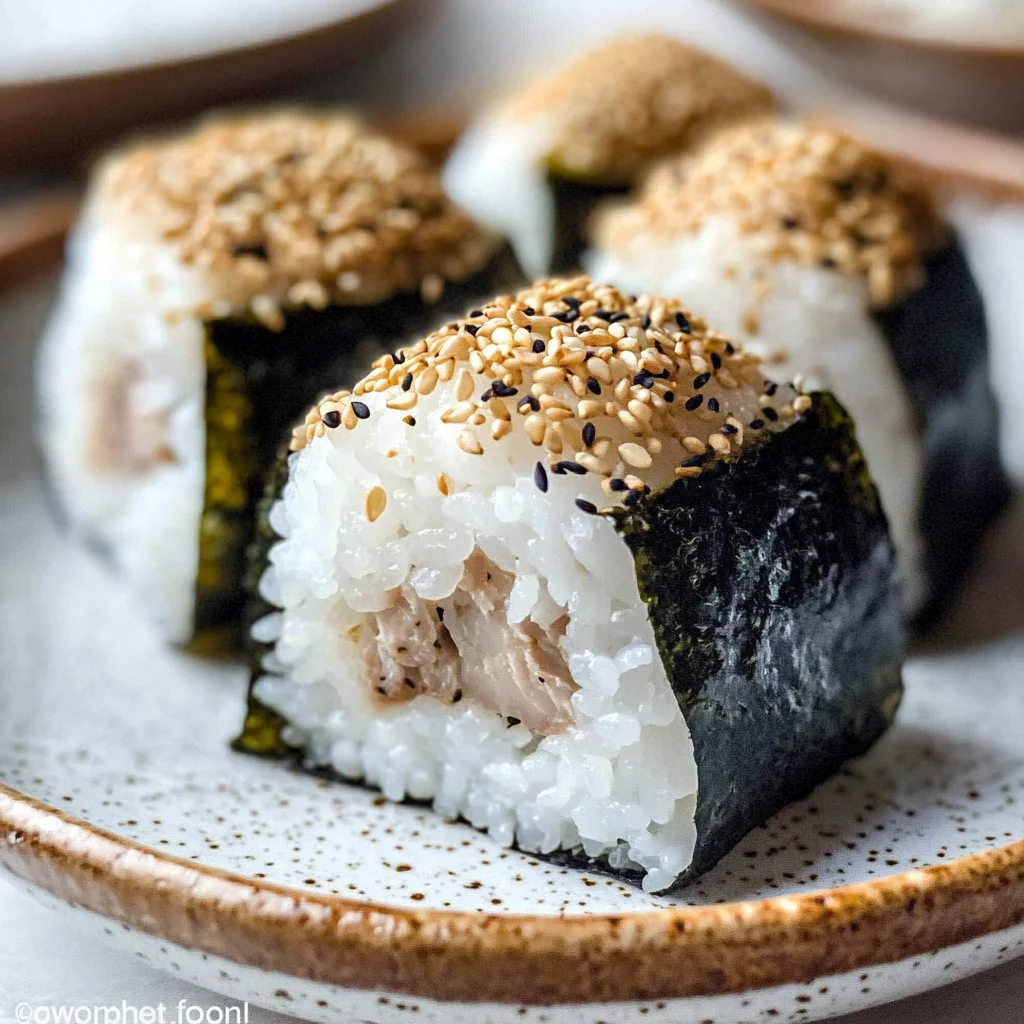
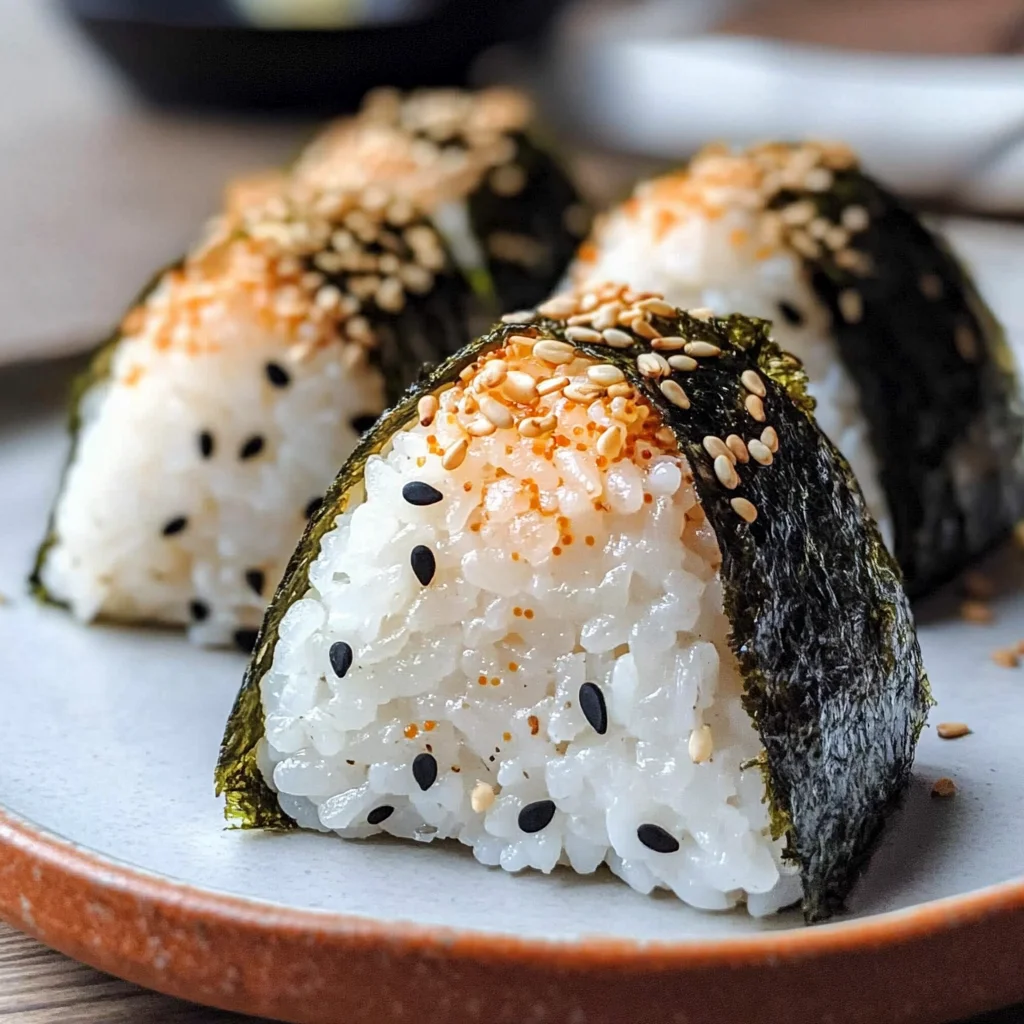
A delicious rice ball stuffed with tuna, mayo wrapped with dry roasted seaweed. This quick and easy Japanese tuna onigiri is made in 15 minutes with only 6 ingredients. Great for breakfast, as a snack, meal, lunchbox item or picnic food!
For the Onigiri
- 2 sheets nori (or use 1/2 sheet if you prefer less)
- 1 tsp sesame seeds (for garnishing, optional)
- 2 cups cooked short grain rice (if you’re making fresh rice, see Notes below)*
- 1/2 tsp salt
For the Filling
- 5.29 oz canned tuna (in oil recommended, or canned tuna in water)
- 2 tbsp Japanese mayo (or regular mayonnaise)
How to Make 15-min. Easy Japanese Tuna Onigiri
Step 1: Prepare the Rice
Transfer hot cooked short-grain rice into a large bowl and season with salt using a rice paddle. Cover and set aside. If you’re using leftover cold rice, cover it and microwave for 2-3 minutes prior to seasoning.
Step 2: Prepare the Tuna Filling
Open a can of tuna and strain it using a fine sieve to remove as much liquid as possible by pressing it with a fork. Transfer the strained tuna to a small bowl. Mix in the Japanese mayo until well combined. Set aside.
Step 3: Prepare Nori Sheets
Decide how much nori you want based on your personal preference. Use two nori sheets cut in half for four pieces or just half a sheet cut into four equal strips if you prefer less.
Step 4: Shape the Rice Balls
Prepare a bowl of water nearby and dip clean hands into it. Take 1/2 cup or about 100 grams of cooked rice and place it in your palm. Shape it into a round ball, then flatten it into about a 1/2-inch thick pancake. Create a dent in the middle and fill it with 2 tbsp or about 30 ml of the tuna mayo mixture. If you have an onigiri mold or plastic wrap, use these tools to mold your rice balls easily.
Step 5: Form Into Triangles
Fold the rice over the filling while pushing it into the center. Firmly pack it into a ball shape before flattening it to about an inch thick to form triangles; wetting your hands as needed will keep things tidy.
Step 6: Wrap with Nori
Wrap each triangle with nori starting from its base around the sides. Repeat this process until you’ve made all four rice balls. Garnish each piece with sesame seeds for an extra crunch! Enjoy immediately!
How to Serve 15-min. Easy Japanese Tuna Onigiri
Serving 15-min. Easy Japanese Tuna Onigiri can be a delightful experience, whether for breakfast, a light snack, or as part of a picnic. These versatile rice balls can be paired with various sides and garnishes to enhance their flavor and presentation.
As a Breakfast Treat
- Serve with fresh fruit slices like kiwi or strawberries to add a refreshing touch.
- Pair with green tea for a traditional Japanese breakfast experience.
For Lunch Boxes
- Include carrot sticks or cucumber slices for a crunchy contrast.
- Pack with cherry tomatoes for a burst of color and flavor.
At Picnics
- Wrap each onigiri in parchment paper for easy handling.
- Add some sweet soy sauce or teriyaki sauce in small containers for dipping.
As an Appetizer
- Serve alongside pickled vegetables to balance the flavors.
- Garnish with sesame seeds to add an appealing crunch.
How to Perfect 15-min. Easy Japanese Tuna Onigiri
To make your 15-min. Easy Japanese Tuna Onigiri even better, consider these helpful tips:
- Use warm rice: Warm rice is easier to mold and will help the onigiri hold its shape better.
- Adjust seasoning: Taste the tuna mayo mixture and adjust the salt or mayo according to your preference.
- Experiment with shapes: While triangles are traditional, try making round onigiri for a fun variation.
- Keep hands wet: Dipping your hands in water prevents rice from sticking, making shaping easier.
Best Side Dishes for 15-min. Easy Japanese Tuna Onigiri
For a complete meal, pair your 15-min. Easy Japanese Tuna Onigiri with these delightful side dishes:
- Miso Soup: A warm bowl of miso soup provides comfort and complements the rice balls beautifully.
- Edamame: These steamed soybeans offer protein and can be seasoned lightly with salt for extra flavor.
- Seaweed Salad: A tangy seaweed salad adds freshness and is rich in nutrients.
- Pickled Ginger: The sharpness of pickled ginger acts as a palate cleanser between bites of onigiri.
- Cucumber Sunomono: This light cucumber salad dressed in rice vinegar adds crunch and acidity.
- Tempura Vegetables: Lightly battered and fried vegetables like sweet potato or zucchini bring extra texture to your meal.
Common Mistakes to Avoid
Making 15-min. Easy Japanese Tuna Onigiri can be simple, but there are common mistakes to watch for to ensure your rice balls turn out perfect.
- Using cold rice: Cold rice will not shape well and may not stick together. Always use hot, freshly cooked short-grain rice or reheat any leftover rice before using.
- Overfilling the onigiri: Adding too much tuna mayo can make it difficult to seal the rice ball. Stick to the recommended amount of filling for easy molding and packing.
- Neglecting to wet hands: Dry hands can make the rice stick, leading to a messy preparation. Always dip your hands in water before handling the rice for easier shaping.
- Not pressing firmly enough: If you don’t pack the rice tightly, the onigiri may fall apart. Ensure you press firmly while shaping to create a sturdy ball or triangle.
- Skipping nori preparation: Using unprepared nori can lead to soggy or tough seaweed. Toast nori lightly if desired for better flavor and texture.
Storage & Reheating Instructions
Refrigerator Storage
- Store in an airtight container: This prevents moisture loss and keeps them fresh.
- Best consumed within 1-2 days: Onigiri tastes best fresh but can be kept refrigerated for a short period.
Freezing 15-min. Easy Japanese Tuna Onigiri
- Wrap individually: Use plastic wrap or parchment paper to prevent freezer burn.
- Store in a freezer-safe bag: Remove excess air before sealing; they can last up to a month.
Reheating 15-min. Easy Japanese Tuna Onigiri
- Oven: Preheat your oven to 350°F (175°C). Place onigiri on a baking sheet and heat for about 10 minutes until warm.
- Microwave: Place onigiri on a microwave-safe plate and cover with a damp paper towel. Heat for 30 seconds to 1 minute until warmed through.
- Stovetop: Heat a non-stick skillet over low heat. Place the onigiri in the pan, cover, and warm for about 5 minutes, flipping halfway through.
Frequently Asked Questions
If you’re curious about making 15-min. Easy Japanese Tuna Onigiri, here are some frequently asked questions that might help you.
How do I prepare the rice for onigiri?
You should use short-grain rice that is cooked and seasoned with salt while it’s still hot. This ensures it sticks together well when forming the onigiri.
Can I use other fillings for my onigiri?
Absolutely! You can customize your onigiri with various fillings such as avocado, pickled vegetables, or even grilled chicken for different flavors.
What is the best way to eat tuna onigiri?
Enjoy tuna onigiri as a quick snack, lunchbox item, or picnic food. They’re delicious fresh but also great at room temperature!
Can I make these ahead of time?
Yes! You can prepare them in advance and store them in the fridge or freezer, just remember to reheat properly before serving.
Is there a vegetarian option for this recipe?
Certainly! Substitute tuna with mashed avocado or marinated tofu mixed with mayonnaise for a delightful vegetarian version of onigiri.
Final Thoughts
The 15-min. Easy Japanese Tuna Onigiri is not only quick to make but also versatile enough to suit any meal occasion—from breakfast to snacks and lunchboxes. Feel free to customize your fillings according to your taste preferences, making every bite unique!
Did You Enjoy Making This Recipe? Please rate this recipe with ⭐⭐⭐⭐⭐ or leave a comment.
📖 Recipe Card
Print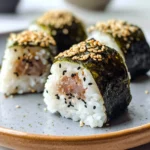
15-min. Easy Japanese Tuna Onigiri
- Total Time: 15 minutes
- Yield: Makes approximately four onigiri 1x
Description
Enjoy this quick recipe for 15-min. Easy Japanese Tuna Onigiri—perfect for snacks or lunchboxes! Try it today and savor every bite!
Ingredients
- 2 sheets nori
- 1 tsp sesame seeds (optional)
- 2 cups cooked short-grain rice
- 1/2 tsp salt
- 5.29 oz canned tuna (in oil or water)
- 2 tbsp Japanese mayo (or regular mayonnaise)
Instructions
- Prepare the Rice: In a large bowl, combine hot cooked short-grain rice and salt using a rice paddle. Set aside.
- Make the Filling: Strain canned tuna using a fine sieve and mix it with Japanese mayo in a small bowl until well combined.
- Shape the Rice Balls: Wet your hands and take approximately 1/2 cup of rice. Flatten it into a pancake shape, create a dent in the center, and add 2 tbsp of the tuna mixture.
- Form Triangles: Fold the rice over the filling to shape it into a triangle, pressing firmly for stability.
- Wrap with Nori: Wrap each triangle with nori starting from its base and garnish with sesame seeds if desired.
- Prep Time: 10 minutes
- Cook Time: 5 minutes
- Category: Snack
- Method: No-cook
- Cuisine: Japanese
Nutrition
- Serving Size: 1 onigiri (100g)
- Calories: 220
- Sugar: 0g
- Sodium: 400mg
- Fat: 8g
- Saturated Fat: 1g
- Unsaturated Fat: 6g
- Trans Fat: 0g
- Carbohydrates: 30g
- Fiber: 1g
- Protein: 9g
- Cholesterol: 20mg