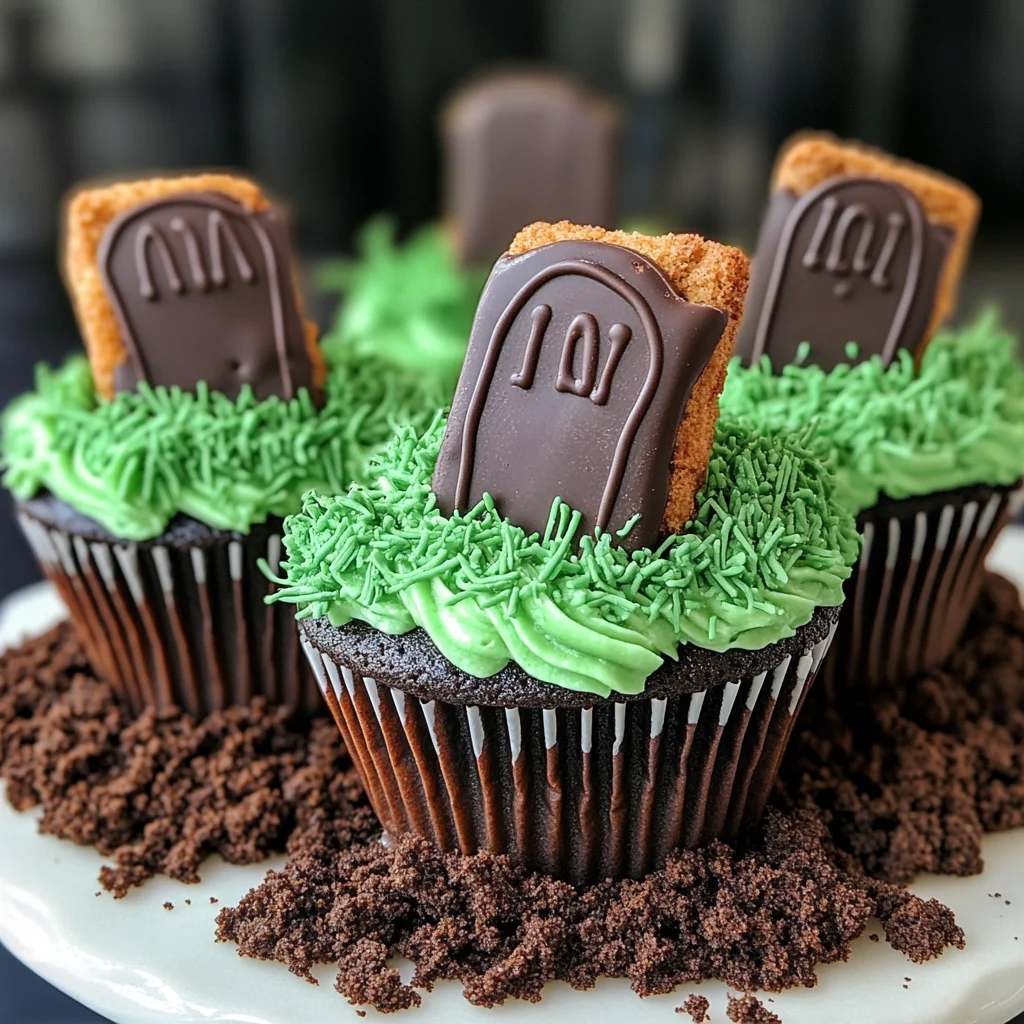
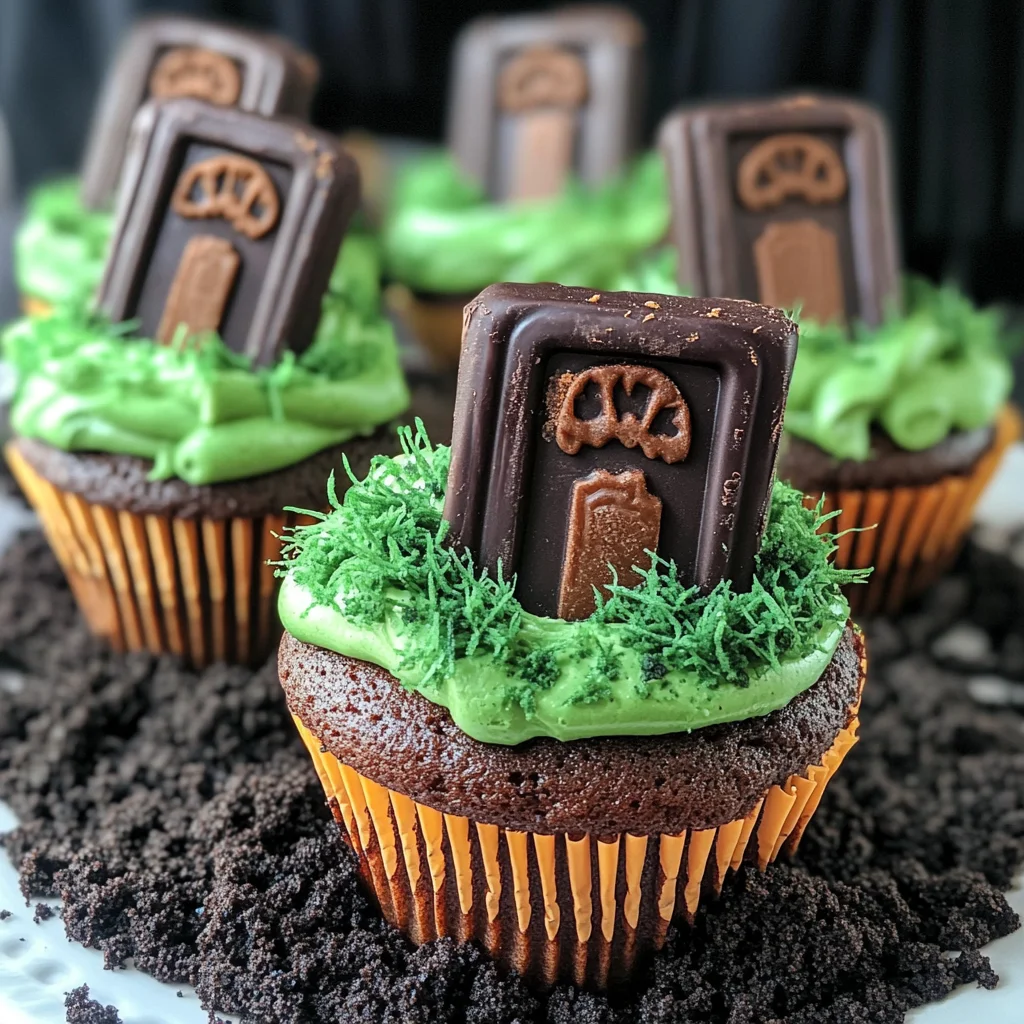
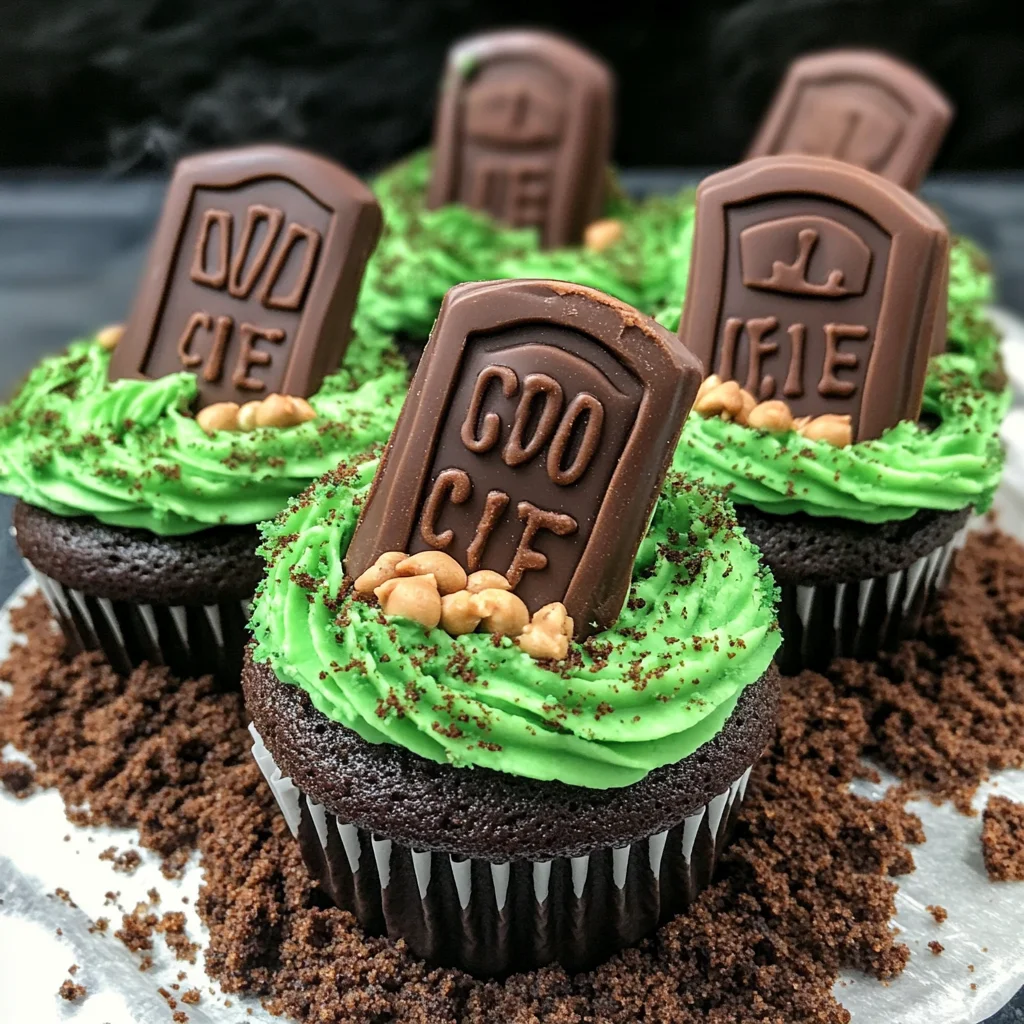
Halloween Graveyard Cupcakes are not just a treat; they’re a spooky masterpiece that will impress your guests this Halloween season. With their rich chocolate flavor, creamy Oreo cheesecake filling, and delightful decorations, these cupcakes make for a perfect centerpiece at any Halloween gathering or party. The creative design mimics a graveyard scene that is sure to bring fun and excitement to your celebrations!
Jump to:
- Why You’ll Love This Recipe
- Tools and Preparation
- Essential Tools and Equipment
- Importance of Each Tool
- Ingredients
- For the Cake:
- For the Oreo Cheesecake Filling:
- For the Chocolate Buttercream:
- For the Green Grass Buttercream:
- How to Make Halloween Graveyard Cupcakes
- Step 1: Make the Biscuit Graves
- Step 2: Decorate the Biscuit Graves
- Step 3: Preheat Your Oven
- Step 4: Make the Chocolate Sponge Mix
- Step 5: Combine Dry Ingredients
- Step 6: Bake Your Cupcakes
- Step 7: Prepare Oreo Cheesecake Filling
- Step 8: Core Your Cupcakes
- Step 9: Make Chocolate Buttercream
- Step 10: Make Green Grass Buttercream
- Step 11: Decorate Your Cupcakes
- Step 12: Add Soil & Grass
- How to Serve Halloween Graveyard Cupcakes
- Creative Presentation Ideas
- Accompaniments
- How to Perfect Halloween Graveyard Cupcakes
- Best Side Dishes for Halloween Graveyard Cupcakes
- Common Mistakes to Avoid
- Storage & Reheating Instructions
- Refrigerator Storage
- Freezing Halloween Graveyard Cupcakes
- Reheating Halloween Graveyard Cupcakes
- Frequently Asked Questions
- Can I use different types of chocolate for the cupcakes?
- What other fillings can I use instead of Oreo cheesecake?
- How do I make my Halloween Graveyard Cupcakes more festive?
- How long do these cupcakes take to prepare?
- Can I make these cupcakes ahead of time?
- Final Thoughts
- 📖 Recipe Card
Why You’ll Love This Recipe
- Spooky Presentation: The graveyard theme makes these cupcakes visually striking and fun for Halloween parties.
- Delicious Flavor: Rich chocolate cake combined with creamy Oreo filling creates a mouthwatering taste experience.
- Easy to Customize: You can adjust decorations or fillings based on personal preferences or dietary needs.
- Fun Activity: Making these cupcakes can be a delightful family activity, perfect for kids and adults alike.
- Perfect for Sharing: With 12 servings, these cupcakes are ideal for gatherings, ensuring everyone gets a taste of the festive spirit.
Tools and Preparation
To create your Halloween Graveyard Cupcakes effectively, you’ll need some essential kitchen tools.
Essential Tools and Equipment
- Cupcake tin
- Cupcake cases
- Mixing bowls
- Electric whisk or stand mixer
- Piping bags and nozzles
- Baking paper
Importance of Each Tool
- Cupcake tin: This tool ensures your cupcakes have the right shape and size for baking.
- Electric whisk or stand mixer: These appliances make mixing ingredients faster and more efficient, providing a better texture in your batter.
- Piping bags: Ideal for decorating your cupcakes with precision, helping achieve that spooky graveyard look.
Ingredients
To make these delightful Halloween Graveyard Cupcakes, gather the following ingredients:
For the Cake:
- 12 Lotus biscoff biscuits
- 150 g Dark chocolate (melted)
- 30 g White chocolate (melted)
- 175 g Baking spread or butter (softened, unsalted)
- 175 g Caster sugar
- 3 Eggs (large)
- 2 tbsp Milk
- 150 g Self raising flour
- 25 g Cocoa powder
- 1/4 tsp Baking powder
For the Oreo Cheesecake Filling:
- 115 g Full fat cream cheese
- 15 g Icing sugar
- 15 g Oreos (crushed)
- 1/8 tsp Vanilla extract
For the Chocolate Buttercream:
- 100 g Butter (softened, unsalted)
- 165 g Icing sugar
- 35 g Cocoa powder
- 1–2 tsp Milk
For the Green Grass Buttercream:
- 25 g Butter (softened, unsalted)
- 50 g Icing sugar
- 1/8 tsp Vanilla extract
- Green food colouring
- 35 g Oreos (crushed)
How to Make Halloween Graveyard Cupcakes
Step 1: Make the Biscuit Graves
Start by snapping about a third off each Lotus biscoff biscuit at one end. This will help them fit better in your cupcakes. Melt the dark chocolate and dip each biscuit into it. Place them on baking paper to set.
Step 2: Decorate the Biscuit Graves
Once the dark chocolate is set, melt the white chocolate and fill it into a piping bag. Pipe your desired designs onto the biscuits and leave them to set again.
Step 3: Preheat Your Oven
Preheat your oven to 140C Fan/160C/325F/Gas Mark 3. Line your cupcake tin with cupcake cases to prepare for baking.
Step 4: Make the Chocolate Sponge Mix
In a mixing bowl, combine the baking spread and caster sugar using an electric whisk or stand mixer for about 5 minutes until fluffy. Add in the eggs and milk, whisking until well incorporated.
Step 5: Combine Dry Ingredients
Gently fold in the self raising flour, cocoa powder, and baking powder into the mixture until just combined.
Step 6: Bake Your Cupcakes
Divide your batter evenly among the lined cupcake cases. Bake them in the preheated oven for 25–30 minutes or until a skewer inserted into the center comes out clean. Allow them to cool completely once baked.
Step 7: Prepare Oreo Cheesecake Filling
While cupcakes are cooling, mix together cream cheese, icing sugar, and vanilla extract until smooth. Stir in crushed Oreos gently until well combined.
Step 8: Core Your Cupcakes
Using a cupcake corer or knife, make holes in the center of each cooled cupcake. Fill these holes with your Oreo cheesecake mixture using either a spoon or piping bag.
Step 9: Make Chocolate Buttercream
In another bowl, mix together softened butter with cocoa powder and icing sugar. Gradually add milk until you reach a smooth consistency.
Step 10: Make Green Grass Buttercream
Combine softened butter with icing sugar in another bowl. Add vanilla extract and green food coloring; mix until smooth and achieve your desired shade.
Step 11: Decorate Your Cupcakes
Pipe generous amounts of chocolate buttercream onto each cupcake using a piping bag fitted with a round nozzle. Insert one decorated biscuit gravestone into each cupcake.
Step 12: Add Soil & Grass
Sprinkle crushed Oreos around each biscuit grave as soil. Use green buttercream to pipe grass around each biscuit gravestone as final decoration.
Store any leftovers in an airtight container in a cool place; enjoy within three days!
How to Serve Halloween Graveyard Cupcakes
Serving Halloween Graveyard Cupcakes can be a delightful experience, especially when you enhance their spooky charm. These cupcakes are perfect for Halloween parties or gatherings, and they can be presented in various fun ways to impress your guests.
Creative Presentation Ideas
- Cupcake Stand Display: Arrange the cupcakes on a multi-tiered cupcake stand to create an eye-catching centerpiece.
- Themed Plates: Use Halloween-themed plates or platters to add to the festive spirit of your dessert table.
- Spooky Garnishes: Consider adding edible eyes or candy spiders on top of the buttercream for an extra frightful touch.
- Personalized Toppers: Create small flags with spooky messages or names and place them in each cupcake for a personalized feel.
Accompaniments
- Milk or Hot Chocolate: Serve with cold milk or warm hot chocolate to balance the sweetness of the cupcakes.
- Halloween Punch: Offer a themed punch that matches the holiday vibe, like a bright orange fruit punch.
How to Perfect Halloween Graveyard Cupcakes
Achieving perfection with your Halloween Graveyard Cupcakes involves attention to detail and technique. Here are some tips to elevate your baking game.
- Bold Ingredients: Always use high-quality cocoa powder and chocolate for richer flavors in your cupcakes.
- Proper Cooling: Ensure that your cupcakes are completely cooled before filling them with cheesecake; this prevents melting and sogginess.
- Chill the Filling: For better consistency, chill the Oreo cheesecake filling before piping it into the cupcakes.
- Pipe with Precision: Use a piping bag fitted with different nozzles for decorating; this allows for more intricate designs in your buttercream.
- Experiment with Colors: Don’t hesitate to mix different shades of green food coloring in your grass buttercream for added depth and visual interest.
Best Side Dishes for Halloween Graveyard Cupcakes
Pairing side dishes with your Halloween Graveyard Cupcakes enhances the overall meal experience. Here are some fantastic options that complement these spooky treats.
- Pumpkin Soup: A warm and creamy pumpkin soup served in small cups makes for a cozy appetizer.
- Bat Wings (Chicken Wings): Marinated chicken wings seasoned with spices and baked until crispy; they add a savory element to balance the sweet cupcakes.
- Witch’s Brew Salad: A mixed salad topped with eerie-looking edible flowers and served with a vibrant dressing.
- Mummy Hot Dogs: Mini hot dogs wrapped in dough to resemble mummies, perfect finger food for a party setting.
- Cauldron Chili: A hearty vegetarian chili that can be served in small bowls, creating a warming contrast to sweet desserts.
- Ghostly Cheese Platter: An assortment of cheeses shaped like ghosts alongside crackers; it’s simple yet festive!
- Frankenstein Veggie Platter: Fresh vegetables arranged creatively to look like Frankenstein’s face, served with hummus for dipping.
- Spider Web Dip: A layered dip using black beans, guacamole, and sour cream designed to resemble a spider web; it’s both tasty and thematic!
Common Mistakes to Avoid
When making Halloween Graveyard Cupcakes, avoiding common pitfalls can ensure your spooky treats turn out perfectly. Here are some mistakes to steer clear of:
- Using cold ingredients: Cold butter or eggs can lead to a lumpy batter. Always use room temperature ingredients for a smooth mixture.
- Not cooling the cupcakes properly: If you frost warm cupcakes, the icing will melt. Allow your cupcakes to cool completely before decorating.
- Skipping the cheesecake filling: The Oreo cheesecake filling adds essential flavor and moisture. Don’t skip this step; it makes your cupcakes stand out.
- Overmixing the batter: Overmixing can create tough cupcakes. Mix until just combined for a light and fluffy texture.
- Ignoring decoration tips: Presentation matters! Pay attention to how you pipe the buttercream and arrange decorations for visually appealing cupcakes.
Storage & Reheating Instructions
Refrigerator Storage
- Store in an airtight container to keep them fresh.
- Halloween Graveyard Cupcakes can last up to 3 days in the refrigerator.
Freezing Halloween Graveyard Cupcakes
- Wrap individual cupcakes in plastic wrap before placing them in a freezer-safe container.
- They can be frozen for up to 2 months; thaw overnight in the fridge before serving.
Reheating Halloween Graveyard Cupcakes
- Oven: Preheat to 180°C (350°F), then heat for about 10 minutes until warmed through.
- Microwave: Heat one cupcake at a time on medium power for about 20 seconds; check and repeat if necessary.
- Stovetop: Place a cupcake on a plate over simmering water, cover with a lid, and heat gently for about 5 minutes.
Frequently Asked Questions
Here are some common questions about making Halloween Graveyard Cupcakes:
Can I use different types of chocolate for the cupcakes?
Yes, you can substitute dark chocolate with milk or white chocolate based on your preference.
What other fillings can I use instead of Oreo cheesecake?
Feel free to experiment with other fillings like vanilla cream or fruit-flavored mousse for variety.
How do I make my Halloween Graveyard Cupcakes more festive?
You can add edible decorations like gummy worms or candy eyes to enhance the spooky theme.
How long do these cupcakes take to prepare?
The total time is approximately 85 minutes, including baking and cooling.
Can I make these cupcakes ahead of time?
Absolutely! Prepare them one or two days in advance and store them properly as mentioned above.
Final Thoughts
Halloween Graveyard Cupcakes are not only delicious but also visually striking, making them perfect for any Halloween gathering. You can customize these treats by adding different toppings or using various flavors in the filling. Give this recipe a try, and impress your guests with these spooky delights!
Did You Enjoy Making This Recipe? Please rate this recipe with ⭐⭐⭐⭐⭐ or leave a comment.
📖 Recipe Card
Print
Halloween Graveyard Cupcakes
- Total Time: 1 hour
- Yield: Makes 12 servings 1x
Description
Create spooky Halloween Graveyard Cupcakes with creamy fillings and chocolate buttercream. Perfectly festive—try this fun recipe today!
Ingredients
- 12 Lotus biscoff biscuits
- 150 g dark chocolate (melted)
- 175 g baking spread or unsalted butter (softened)
- 175 g caster sugar
- 3 large eggs
- 150 g self-raising flour
- 25 g cocoa powder
- 1/4 tsp baking powder
- 115 g full-fat cream cheese
- 15 g icing sugar
- 15 g Oreos (crushed)
- 1/8 tsp vanilla extract
- 100 g unsalted butter (for buttercream)
- 165 g icing sugar
- 35 g cocoa powder
- 1–2 tsp milk
- 25 g butter (for green grass buttercream)
- 50 g icing sugar (for green grass buttercream)
- 1/8 tsp vanilla extract (for green grass buttercream)
- green food coloring
- 35 g Oreos (crushed for grass)
Instructions
- Prepare biscuit graves by snapping about a third off each Lotus biscoff biscuit and dipping them in melted dark chocolate. Let them set on baking paper.
- Preheat your oven to 140C Fan/160C/325F.
- In a bowl, cream together softened baking spread and caster sugar until fluffy. Add eggs and milk; mix well.
- Fold in self-raising flour, cocoa powder, and baking powder until just combined.
- Fill cupcake cases with batter and bake for 25–30 minutes, or until a skewer comes out clean. Cool cupcakes completely.
- Prepare Oreo cheesecake filling by mixing cream cheese, icing sugar, and vanilla extract until smooth. Stir in crushed Oreos gently.
- Core the cooled cupcakes and fill with Oreo cheesecake mixture using a piping bag.
- Make chocolate buttercream by mixing softened butter with cocoa powder and icing sugar; gradually add milk until smooth.
- Pipe chocolate buttercream onto cooled cupcakes.
- Make green grass buttercream by mixing softened butter with icing sugar, vanilla extract, and green food coloring until smooth.
- Decorate with green grass buttercream and insert decorated biscuit graves.
- Prep Time: 30 minutes
- Cook Time: 30 minutes
- Category: Dessert
- Method: Baking
- Cuisine: American
Nutrition
- Serving Size: 1 cupcake (90g)
- Calories: 390
- Sugar: 28g
- Sodium: 180mg
- Fat: 24g
- Saturated Fat: 10g
- Unsaturated Fat: 11g
- Trans Fat: 0g
- Carbohydrates: 38g
- Fiber: 2g
- Protein: 4g
- Cholesterol: 50mg
