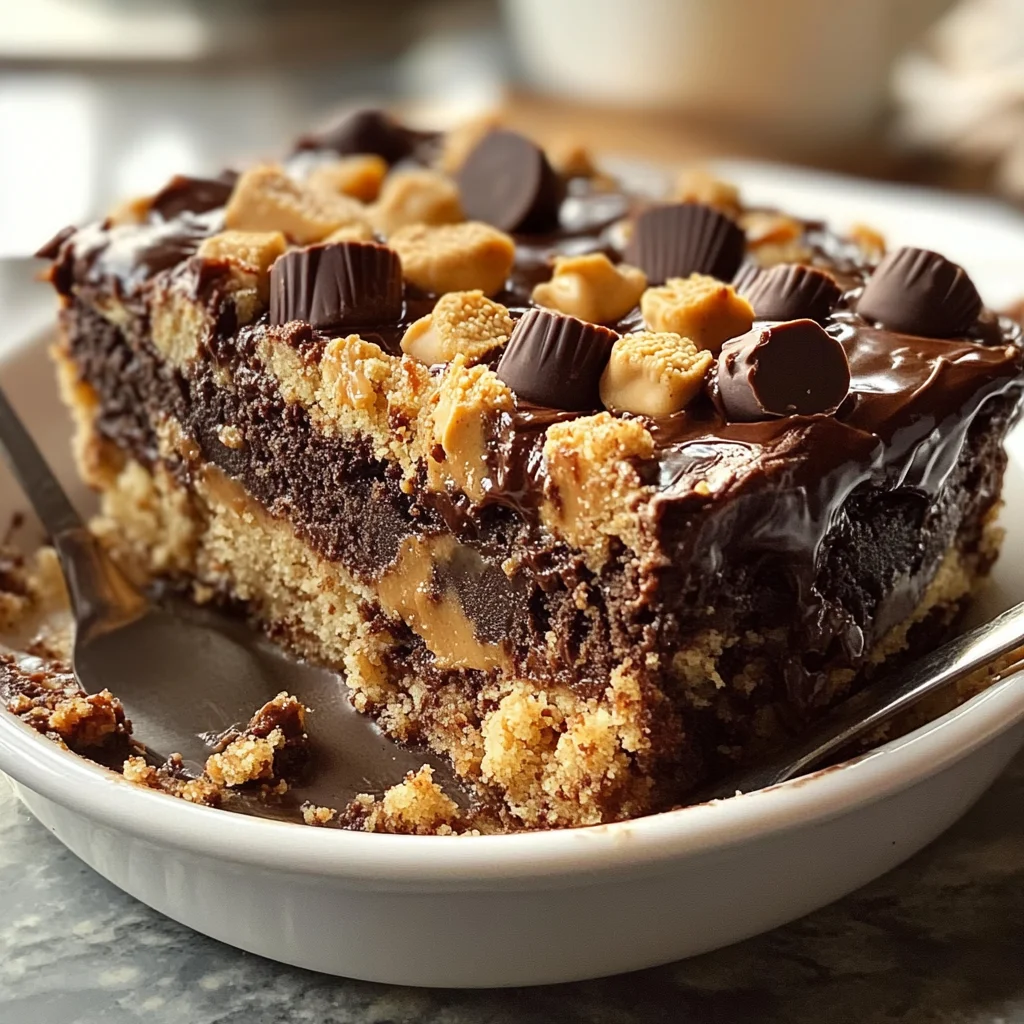
The Peanut Butter Cup Dump Cake is an indulgent dessert that combines rich chocolate and creamy peanut butter for a treat that’s sure to impress. Perfect for parties, family gatherings, or just a cozy night in, this cake is not only easy to make but also incredibly satisfying. With layers of gooey goodness and the crunch of peanut butter cups, this dump cake stands out as a crowd-pleaser.

Jump to:
- Why You’ll Love This Recipe
- Tools and Preparation
- Essential Tools and Equipment
- Importance of Each Tool
- Ingredients
- How to Make Peanut Butter Cup Dump Cake
- Step 1: Preheat the Oven
- Step 2: Spread the Peanut Butter
- Step 3: Add Peanut Butter Cups
- Step 4: Pour in Sweetened Condensed Milk
- Step 5: Layer on Cake Mix
- Step 6: Drizzle with Butter
- Step 7: Top with Chocolate Chips and Remaining Cups
- Step 8: Bake
- Step 9: Cool and Serve
- How to Serve Peanut Butter Cup Dump Cake
- Top with Whipped Cream
- Serve with Vanilla Ice Cream
- Drizzle with Chocolate Sauce
- Garnish with Chopped Nuts
- Pair with Fresh Berries
- Create Individual Portions
- How to Perfect Peanut Butter Cup Dump Cake
- Best Side Dishes for Peanut Butter Cup Dump Cake
- Common Mistakes to Avoid
- Storage & Reheating Instructions
- Refrigerator Storage
- Freezing Peanut Butter Cup Dump Cake
- Reheating Peanut Butter Cup Dump Cake
- Frequently Asked Questions
- How should I serve Peanut Butter Cup Dump Cake?
- Can I customize my Peanut Butter Cup Dump Cake?
- How long does Peanut Butter Cup Dump Cake last?
- Is there a way to make this recipe healthier?
- Can I make this dessert ahead of time?
- Final Thoughts
- 📖 Recipe Card
Why You’ll Love This Recipe
- Easy to Prepare: This recipe requires minimal effort with no complicated steps.
- Decadent Flavor: The combination of chocolate and peanut butter creates a truly irresistible dessert.
- Versatile Serving Options: Serve it warm on its own, or add whipped cream or ice cream for an extra treat.
- Perfect for Any Occasion: Whether it’s a birthday, holiday, or just because, this cake fits all celebrations.
- Kid-Friendly Fun: Kids will love helping to make this cake—and eating it!
Tools and Preparation
Before diving into your Peanut Butter Cup Dump Cake, gather your essential tools. Having everything ready makes the process smooth and enjoyable.
Essential Tools and Equipment
- Baking dish (23×33 cm or 9×13 inches)
- Mixing bowl
- Measuring cups
- Whisk or spoon
- Oven mitts
Importance of Each Tool
- Baking dish: Ensures even cooking and helps achieve the perfect texture.
- Mixing bowl: Keeps your ingredients contained while making it easy to mix them together.
- Measuring cups: Guarantee accurate ingredient amounts for the best results.

Ingredients
Rich, gooey chocolate and peanut butter layers blend with candy cups for a decadent dessert everyone loves.
Ingredients:
– 1 cup creamy peanut butter
– 1.5 cups chopped peanut butter cups, plus extra for garnish
– 1 can (400 g) sweetened condensed milk
– 1 box (432 g) chocolate cake mix, dry
– 115 g unsalted butter, melted
– 175 g milk chocolate chips
– Optional: whipped cream or vanilla ice cream, for serving
How to Make Peanut Butter Cup Dump Cake
Step 1: Preheat the Oven
Preheat your oven to 175°C (350°F). Grease a baking dish with butter or non-stick spray to prevent sticking.
Step 2: Spread the Peanut Butter
Spread the creamy peanut butter evenly over the bottom of the prepared baking dish. This layer serves as a delicious foundation for your cake.
Step 3: Add Peanut Butter Cups
Sprinkle half of the chopped peanut butter cups over the peanut butter layer. This adds delightful chunks throughout the cake.
Step 4: Pour in Sweetened Condensed Milk
Pour the sweetened condensed milk evenly over the candy layer. This will create a moist texture as it bakes.
Step 5: Layer on Cake Mix
Sprinkle the dry chocolate cake mix evenly over the top. Do not mix; let it sit as is for now.
Step 6: Drizzle with Butter
Drizzle the melted butter over the cake mix, aiming to cover as much surface area as possible. This creates a crispy topping during baking.
Step 7: Top with Chocolate Chips and Remaining Cups
Sprinkle milk chocolate chips and the remaining chopped peanut butter cups over everything. This enhances both flavor and presentation.
Step 8: Bake
Bake in your preheated oven for 35–40 minutes, or until the top is bubbly and slightly crisp.
Step 9: Cool and Serve
Allow the cake to cool for about 10–15 minutes before serving. Enjoy warm, topped with optional whipped cream or vanilla ice cream if desired.
How to Serve Peanut Butter Cup Dump Cake
Serving Peanut Butter Cup Dump Cake can elevate your dessert experience. Here are some delightful suggestions to make this treat even more enjoyable.
Top with Whipped Cream
- A generous dollop of whipped cream adds a light and airy contrast to the rich cake, enhancing its indulgence.
Serve with Vanilla Ice Cream
- Vanilla ice cream melts beautifully over the warm cake, creating a deliciously creamy combination that balances the flavors.
Drizzle with Chocolate Sauce
- For chocolate lovers, a drizzle of chocolate sauce on top provides an extra layer of decadence that complements the cake perfectly.
Garnish with Chopped Nuts
- Sprinkling chopped nuts like peanuts or almonds on top adds a delightful crunch and enhances the nutty flavor of the dessert.
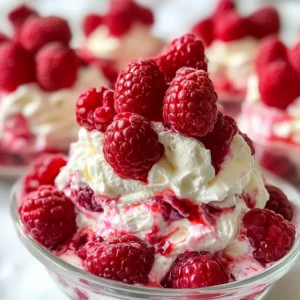
Pair with Fresh Berries
- Fresh strawberries or raspberries provide a tart contrast that brightens up each bite, making it a refreshing addition to this rich dessert.
Create Individual Portions
- Serve the dump cake in individual ramekins for an elegant presentation. This makes it easy for guests to enjoy their own portion.
How to Perfect Peanut Butter Cup Dump Cake
Perfecting your Peanut Butter Cup Dump Cake can take this dessert from good to great. Follow these helpful tips for the best results.
Use room temperature ingredients: Ensure your peanut butter and melted butter are at room temperature. This helps them blend better with the other ingredients for a smoother texture.
Don’t mix the layers: When layering the ingredients, avoid mixing them together. This creates distinct layers that add texture and flavor when baked.
Check baking time carefully: Every oven is different, so start checking your cake around 35 minutes. You want it bubbly and slightly crisp on top but not overbaked.
Let it cool slightly: Allowing the cake to cool for 10–15 minutes before serving allows it to set slightly, making it easier to cut and serve.
Experiment with toppings: Don’t hesitate to try different toppings like caramel sauce or crushed cookies for added flavor and texture variations.
Store leftovers properly: Keep any leftover dump cake covered in an airtight container at room temperature for up to three days, or refrigerate for longer freshness.
Best Side Dishes for Peanut Butter Cup Dump Cake
Pairing side dishes with your Peanut Butter Cup Dump Cake can enhance your dessert experience. Here are some fantastic suggestions to consider.
Fruit Salad: A light fruit salad offers a refreshing contrast to the richness of the dump cake and adds vibrant colors to your table.
Chocolate Pudding: Creamy chocolate pudding serves as an additional chocolaty delight that complements the flavors of your main dessert beautifully.
Nutty Granola: A sprinkle of nutty granola provides crunchiness and pairs well with both ice cream and whipped cream when served alongside the dump cake.
Cheesecake Bites: Mini cheesecake bites add a creamy texture that contrasts nicely with the gooeyness of dump cake while maintaining a sweet balance.
Caramel Apples: Slices of caramel-dipped apples bring in seasonal flavors and provide a fun, interactive element for guests to enjoy alongside their dessert.
Coffee or Tea: Serving warm coffee or tea enhances the overall experience by complementing the sweet flavors of your dump cake without overwhelming them.
S’mores Dip: A warm s’mores dip gives guests another interactive dessert option that’s fun to share while still being indulgent and delicious.
Ice Cream Floats: Pairing your dump cake with an ice cream float provides a nostalgic touch that excites both kids and adults alike during gatherings.
Common Mistakes to Avoid
When making your Peanut Butter Cup Dump Cake, it’s easy to encounter a few common issues. Here are mistakes to watch for:
- Not Greasing the Pan: Forgetting to grease your baking dish can lead to sticking. Always grease the bottom and sides before adding ingredients.
- Overmixing the Cake Mix: Mixing the cake mix can lead to a tough texture. Just sprinkle it on top of the layers without stirring.
- Skipping the Cooling Time: Cutting into the cake too soon can result in a gooey mess. Allow it to cool for at least 10–15 minutes before serving.
- Using Cold Ingredients: Cold peanut butter may not spread easily. Warm it slightly if needed for better application.
- Not Storing Properly: Leaving leftovers uncovered can dry them out. Store in an airtight container for freshness.
Storage & Reheating Instructions
Refrigerator Storage
- Keep any leftover Peanut Butter Cup Dump Cake in an airtight container.
- It will last up to 5 days in the refrigerator.
Freezing Peanut Butter Cup Dump Cake
- Wrap well in plastic wrap and then aluminum foil for best results.
- You can freeze it for up to 2 months.
Reheating Peanut Butter Cup Dump Cake
- Oven: Preheat your oven to 175°C (350°F) and place slices on a baking sheet for about 10 minutes until warm.
- Microwave: Heat individual servings in the microwave for 15-30 seconds, checking frequently to avoid overheating.
- Stovetop: Use a skillet over low heat, cover with a lid, and warm for about 5 minutes.
Frequently Asked Questions
Here are some common questions about Peanut Butter Cup Dump Cake:
How should I serve Peanut Butter Cup Dump Cake?
Serve warm with whipped cream or vanilla ice cream on top for extra indulgence.
Can I customize my Peanut Butter Cup Dump Cake?
Yes! Feel free to add nuts or use different candy types for variety.
How long does Peanut Butter Cup Dump Cake last?
It stays fresh in the fridge for up to 5 days or can be frozen for two months.
Is there a way to make this recipe healthier?
Try reducing the sugar in the sweetened condensed milk or using a lower-calorie cake mix.
Can I make this dessert ahead of time?
Absolutely! You can prepare it a day in advance and bake it just before serving.
Final Thoughts
The Peanut Butter Cup Dump Cake is an easy-to-make dessert that combines rich flavors of chocolate and peanut butter, perfect for gatherings or family dinners. Its versatility allows you to customize ingredients based on preferences, making it a delightful treat that everyone will enjoy. Don’t hesitate—give this recipe a try!
Did You Enjoy Making This Recipe? Please rate this recipe with ⭐⭐⭐⭐⭐ or leave a comment.
📖 Recipe Card
Print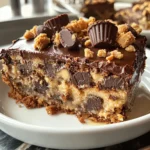
Peanut Butter Cup Dump Cake
- Total Time: 55 minutes
- Yield: Serves approximately 12 people 1x
Description
Indulge in the delightful Peanut Butter Cup Dump Cake, a rich and gooey dessert that marries the luscious flavors of chocolate and creamy peanut butter. This easy-to-make treat is perfect for parties or cozy family gatherings, featuring layers of sweet goodness topped with crunchy peanut butter cups. With minimal effort required, this layered dump cake is a true crowd-pleaser that promises satisfaction in every bite. Enjoy it warm on its own or elevate your dessert experience with whipped cream or vanilla ice cream for an extra touch of indulgence.
Ingredients
- 1 cup creamy peanut butter
- 1.5 cups chopped peanut butter cups
- 1 can (400 g) sweetened condensed milk
- 1 box (432 g) chocolate cake mix, dry
- 115 g unsalted butter, melted
- 175 g milk chocolate chips
Instructions
- Preheat your oven to 175°C (350°F) and grease a 23×33 cm (9×13-inch) baking dish.
- Spread the creamy peanut butter evenly across the bottom of the prepared dish.
- Sprinkle half of the chopped peanut butter cups over the peanut butter layer.
- Pour the sweetened condensed milk evenly over the candy layer.
- Evenly sprinkle the dry chocolate cake mix on top without mixing.
- Drizzle melted butter over the cake mix, covering as much surface as possible.
- Top with remaining milk chocolate chips and chopped peanut butter cups.
- Bake for 35–40 minutes until bubbly and slightly crisp on top.
- Allow to cool for 10–15 minutes before serving warm.
- Prep Time: 15 minutes
- Cook Time: 40 minutes
- Category: Dessert
- Method: Baking
- Cuisine: American
Nutrition
- Serving Size: 1 slice (approximately 100g)
- Calories: 420
- Sugar: 34g
- Sodium: 380mg
- Fat: 20g
- Saturated Fat: 10g
- Unsaturated Fat: 8g
- Trans Fat: 0g
- Carbohydrates: 56g
- Fiber: 2g
- Protein: 7g
- Cholesterol: 25mg